How to:
 The most important step in cleanly blowing out eggs is to make sure the eggs are at room temperature. Eggs taken directly from a refrigerator or cooler will be very hard to blow out.
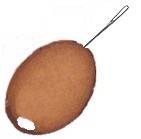
Start by poking a hole in each end of the egg with your needle. Be sure to puncture the egg yolk with your needle. Enlarge the hole at one end with a small sharp object. The pin size hole at the other end will be large enough.
Blow gently through the small hole with the large hole facing down into a large mixing bowl. If you have never blown eggs before, be prepared for the egg to break (just in case) into the bowl and not all over you or your work area. This can and probably will happen if you are blowing several eggs.
Once you have blown the eggs clean, place them in a bowl of water to rinse them and then return them to the egg carton with the largest hole placed at the bottom. This will allow any left overs to run into the carton.
If you like, you can wash your eggs in a half water, half white vinegar solution, but be careful with brown eggs. If brown eggs are left in this solution, the colour will fade very quickly. So, if you want to lighten your eggs a little, let them sit in the solution of vinegar and water for a few minutes. There is a catch though. - you must hold the eggs so that they are completely immersed in the solution, or you will end up with rings forming, where the air and the mixture meet.
You can decorate however your imagination directs you! (we always painted them) Have fun!

No comments:
Post a Comment